Contenu
| Sommaire | ||||
|---|---|---|---|---|
|
Next Step
Payline
Payline is a secure payment solution that manages 5,000 merchants. Composed of two distinct environments but ISO between ISO between them :
- The Production environment : It's the real world. All the real payment pass by the Production environement. All modification made on the production plateforme could impact seriously on the payment process.
- The Sandbox environment :It's the test world. It allows all tests to be performed before going into production. It is necessary to ensure that the operation on this environment is optimal and meets expectations.
The platform allows to process payments. It is connected to many new ways of payment. Their integration is greatly simplified by using the Payline solution.
Integration processus
Here is how an integration takes place:
Step 1: Implementation of the payment solution, in accordance with the specifications.
Step 2: Validation of the integration and signature of the acceptance report.
Step 3: Monitoring transaction flows to detect a potential problem and fix it quickly.
Each integration lot must respect the 3 integration steps.
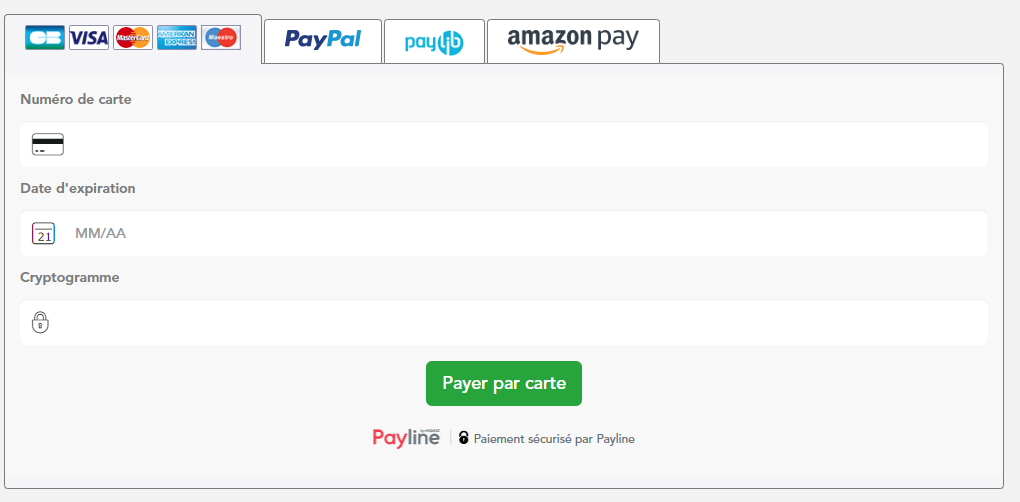
Lifecycle of a transaction
Payline uses web services to communicate with the merchant server. In a web payment, the doWebPayment web service is used. It triggers the opening of a payment session. After checking the data, Payline sends: 00000 if OK or an error code if KO.
Also in the return frame is the token associated with the transaction and the redirect URL if the redirection mode is used. Using the token, the widget is initialized and the shopper can proceed to the payment. At the end of the payment, the shopper is redirected to the "Return URL" provided in the doWebPayment call.
The call to the web service getWebPaymentDetail is triggered by the return on the "Return URL" or by the notification. In the getWebPaymentDetailResponse, the result and all the details of the transaction are sent. Then the payment session is closed, the payment made, the merchant can display the payment confirmation on his page.
Example transaction :
For a 1000€ travel, the buyer has to pay 30% of the total amount of down payment the day of booking and the rest 30 days before the trip.
The first payment (30% of the total amount) :
| Diagramme draw.io | ||||||||||||||||||||||||
|---|---|---|---|---|---|---|---|---|---|---|---|---|---|---|---|---|---|---|---|---|---|---|---|---|
|
- Return URL : The return URL is the URL of return after a payment. Usually, this page displays the payment success or failure information. The token is always passed in a parameter. When the user is redirected on this page, you have to call the getWebPaymentDetailRequest with the token pass in a parameter, and wait for the response before confirm or not the payment.
Cancel URL : The cancel URL is used when a transaction is canceled.
- Notification URL : The Notification URL is used if no getWebPaymentDetail request call is made. It is called and the token is passed as a parameter. Upon receipt of a notification on this URL, a getWebPaymentDetail request with the token must be issued by your server. This is an example of notification: http://localhost:8081/notif.php?notificationType=WEBTRS&token=1mGfbBP1u9l9QjJhh2441551272706113
Back-end (.net core)
Download the package here.
The .NET SDK consists of the following:
An example of a web application using the SDK;
A library of functions that links the functions of the Payline API;
An SDK configuration file;
An installation instruction of the integration SDK;
The WSDL file describing the web services offered by Payline.
Structure and functions
Every web service Payline is composed of two files :
- One ASPX.CS file with the presentation form ;
- One ASPX file gets the data sent by the user across the form. The C# code does the web service call.
The Library
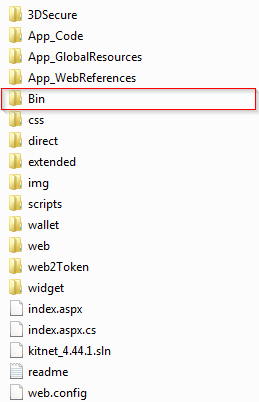
The SDKPayline class use SDKPayline.dll in the Bin repertory. This class describe a function for each web service using the same name : doWebPayment, do Authorisation. You have to update the file with the PaylineSDK_4.52.dll.
The parameter pass is described in each sample page of the SDK.
Configuration of the SDK
Once the SDK is install in the server the Resource.resx file as to be filled with the following configuration settings
Tab
Mobile
Tablette
Desktop
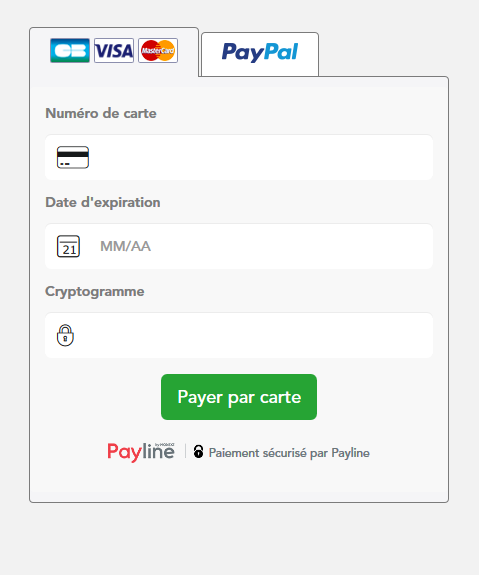
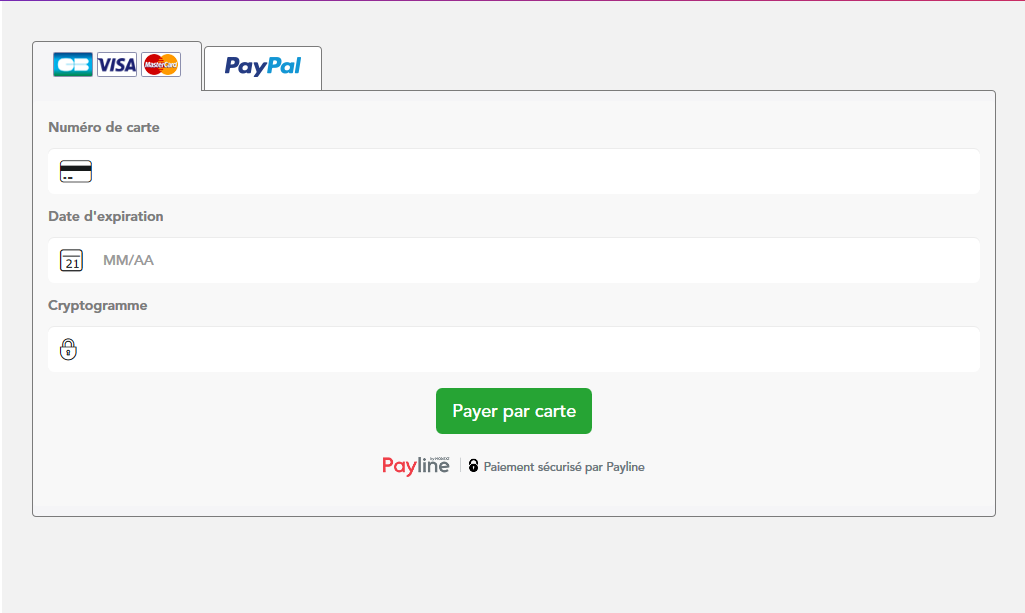
Customization of the widget
Rules
Always keep the original .css file in case of update
- Create your own .css file
- In this file always change the class and not the ID
- Use the "!important;" CSS function to force the parameter
Integration important information
Cancel button : The cancel button will call the cancel url passed in the DoWebPayment Request.
- When send the DoWebPayment REQUEST ? The DoWebPayment request must be executed when the user wants to pay. As a reminder, the order reference must be unique. To avoid too many calls to our server: The solution is to store the token and reuse it in case of updating. If the token is 3 minutes old then re-execute a DoWebPayment request. If the user rolls back and clicks the button again, we recommend running a new DoWebPayment request with the updated transaction information.
- When send the GetWebPaymentDetail REQUEST ? The GetWebPaymentDetail request must be executed as soon as a user arrives on the return URL. There is no need to run multiple GetWebPaymentDetail requests.
Integration example
Please download these files and put them in a server (local or not): ![]() PLEASE UPDATE THE URLS IN THE DOWEBPAYMENT REQUEST
PLEASE UPDATE THE URLS IN THE DOWEBPAYMENT REQUEST ![]()
You can now try the widget with a fresh token (a session expires after 15 minutes)
Get a fresh token.
Call the testpayment.html page :

In the form past the token :

The test.php page is called and the widget initialized with the token. you can analyze the code of the test.php page :
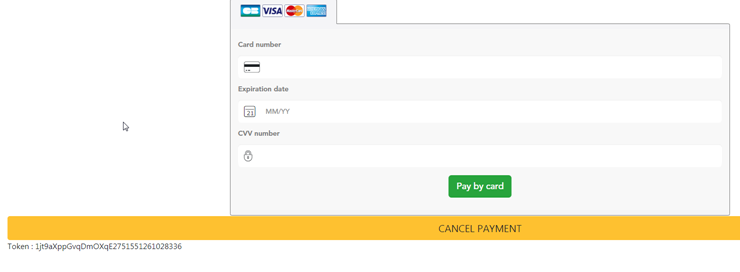
Enter your test card information or click on "CANCEL PAYMENT" to trigger the cancel function :
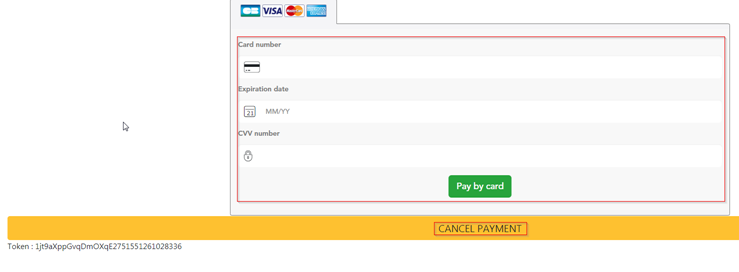
If you have entered your card data you will be redirected on the "Return URL" from the DoWebPayment REQUEST :

If you have click on the CANCEL PAYMENT button, you will be redirected on the "CANCEL URL" from the DoWebPayment REQUEST.